I started my college years believing that I’d be a high school band director. Therefore, when I found myself in the elementary music classroom years later, it felt natural to include instruments in my lesson plans. Yet, for teachers without an instrumental background, it can be intimidating.
Starting with the smallest steps, and working your way slowly forward, is the way to go. Here’s how I often sequenced a lesson with a new (to the kids) instrument. We’ll use Orff Instruments as an example.
ORFF INSTRUMENT SEQUENCE
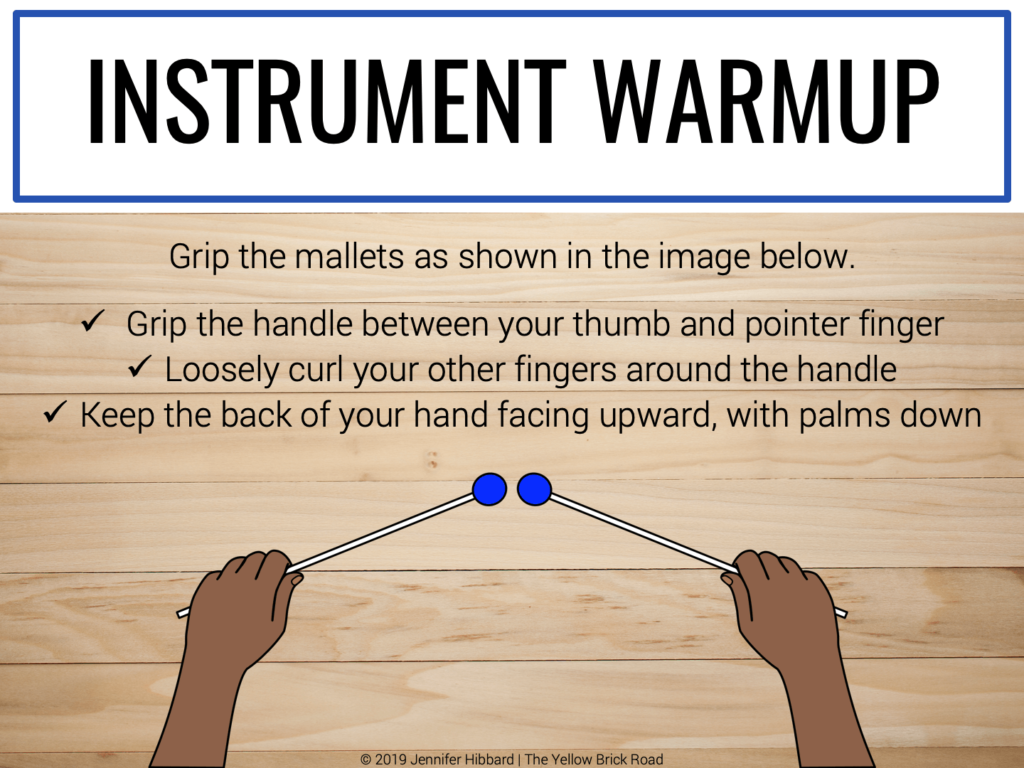
- I modeled the rest (on our shoulders) and play position (held aloft) for the mallets. No bars were involved at this point. We focused solely on the mallets.
- Once students retrieved the mallets, we practiced both positions several times, and ridiculously fast, because that makes it more fun.
- We practiced bouncing (not thudding) our mallets on the floor or chairs. I walked around and corrected hand positions. “Fingers curled like you’re riding a bike”.
- Then, we practiced bouncing our mallets to a steady beat. You can find lots of fun steady beat tracks on Youtube for this purpose. Be sure to choose slow, medium, and fast tempos for them to practice. I continued to adjust hand positions as we did this.
- We moved to sit in front of our instruments while practicing our rest position. This is a good time to remind students “not to play before you say”. Be firm (but gentle) with the consequences, as this really will set the tone for the rest of the class period.
- Give students at least 30 seconds to explore the instrument. This means that they can play whatever they want, any pitch, any rhythm. Remind them that hitting too hard isn’t playing the instrument, it’s damaging the instrument. Again, be firm (but gentle) with the consequences.
- Ask students to put their mallets down, and model how to add and remove bars on their instruments. You may choose to do this before they enter the room, but it’s a good skill to have for the future.

- Finally, have students pick up one mallet and practice playing a steady beat on one of the bars. Again, vary the tempo as you go so they get experience with slow, medium, and fast.
- Continue in this sequence with whatever lesson you have planned.
- This video show examples of a simple, broken, cross-over/arpeggiated, and level bordun.
- This video is a great model of expectations for Orff Instruments.
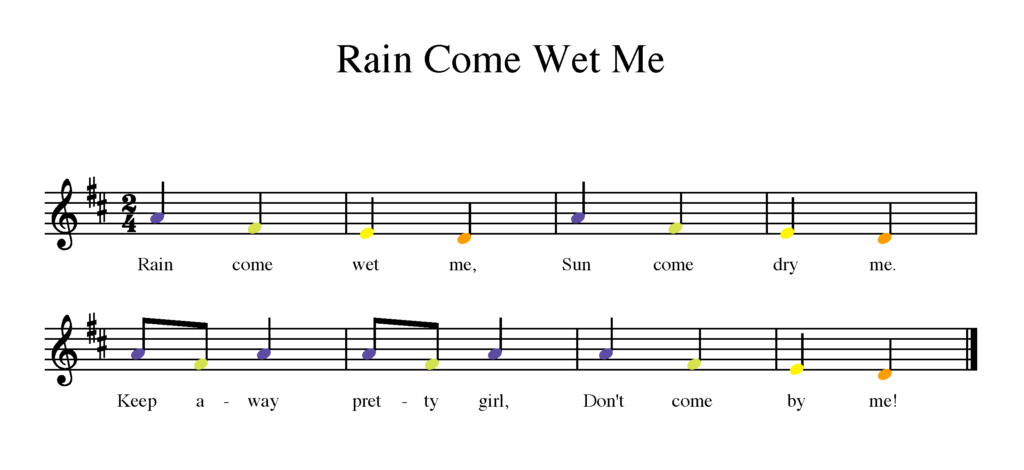
NOTATION IN COLOR
Colored notation doesn’t have to be relegated to colored instruments. You can use colored notation as an aide for all students when they begin to read notation. As I’ve mentioned before, I taught myself to play piano as a young girl via my grandmother’s colored notation booklets.
Of course, it’s important to phase this out over time, but can be beneficial in helping students differentiate notes.
For additional aides, you can purchase colored stickers like these to place on your Orff Instruments. However, you’ll want to test them first to ensure they don’t leave any sticky residue when removed.