I have a confession.
Are you ready?
I’ve been really disappointed in my blog posts recently. There’s not nearly enough talk of coffee, cats, or anything else that keeps me entertained. In light of that, I’m doing another tutorial on PowerPoint (PPT.) There’s nothing inherently entertaining about PPT’s sluggish nature or the colorful words I invent when the rainbow wheel of death appears for the umpteenth time. However, I really enjoy writing tutorials, and PPT continues to be my go-to program for creating educational resources. Let’s just say that it’s a highly functioning love/hate relationship.
Today’s tutorial will include all the basic steps from the last tutorial (which you can read about here), with a few advanced features added in. It won’t be hard. I promise. I’ll be showing you how to make “happy notes” for your students. Happy notes are small certificates of congratulations for mastering a specific musical skill, modeling good behavior, or other positive actions shown by your students. With so many kids coming through your door each week, happy notes are a small, but meaningful way to acknowledge each student’s effort.
Okay, grab your coffee and cat (or not) and let’s get started!
1. Open a new file in landscape mode.
2. Get rid of title boxes.
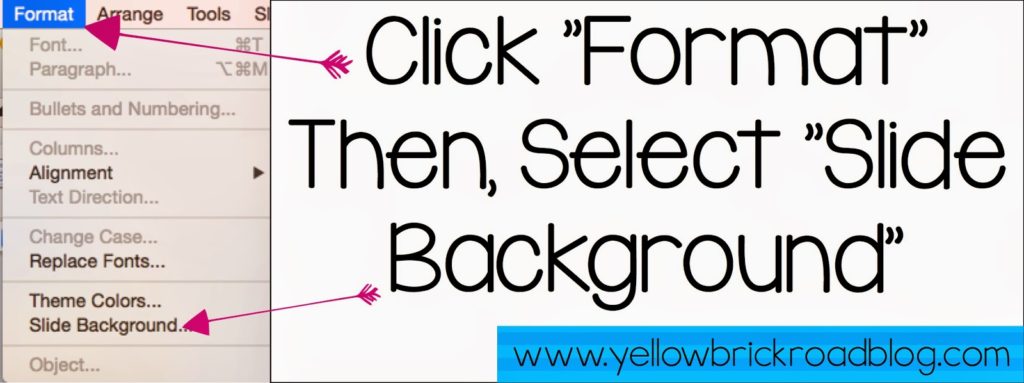
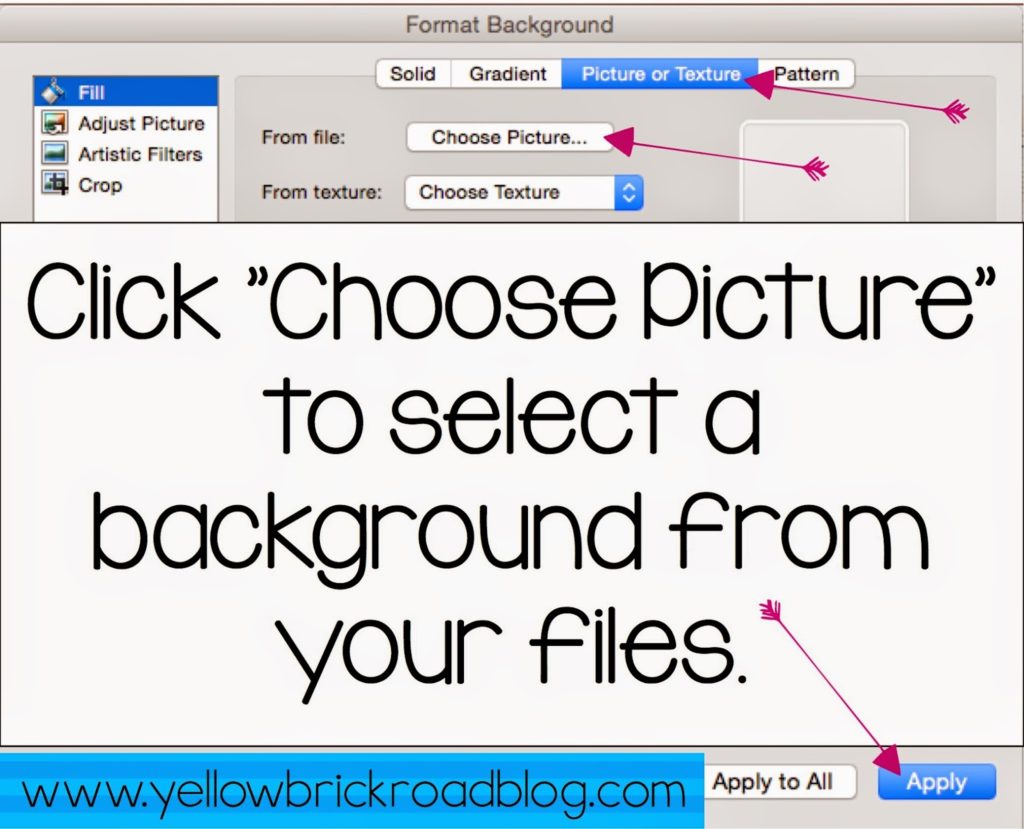
3. Choose a background. Or not.
Since certificates are something you would hand out daily, I’m sticking with a plain background coupled with black and white clipart to save ink.
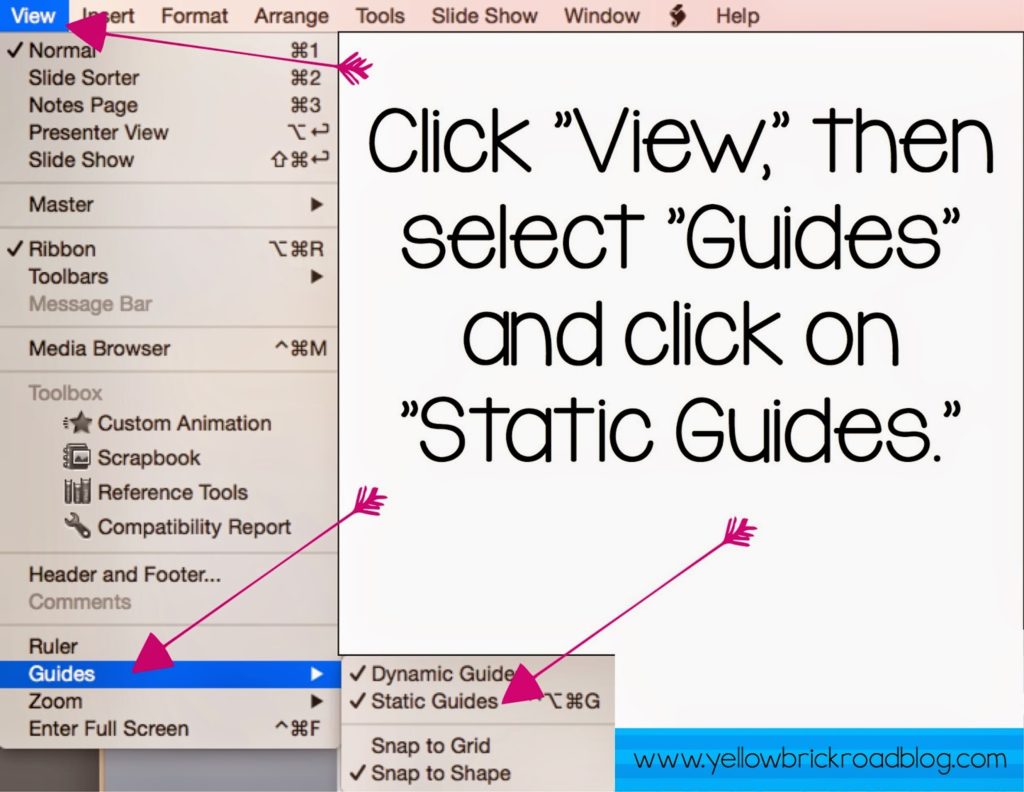
4. View gridlines.
I want to create four happy notes per page, so I’ll use the “Static Guides” to help me see how big each happy note should be.
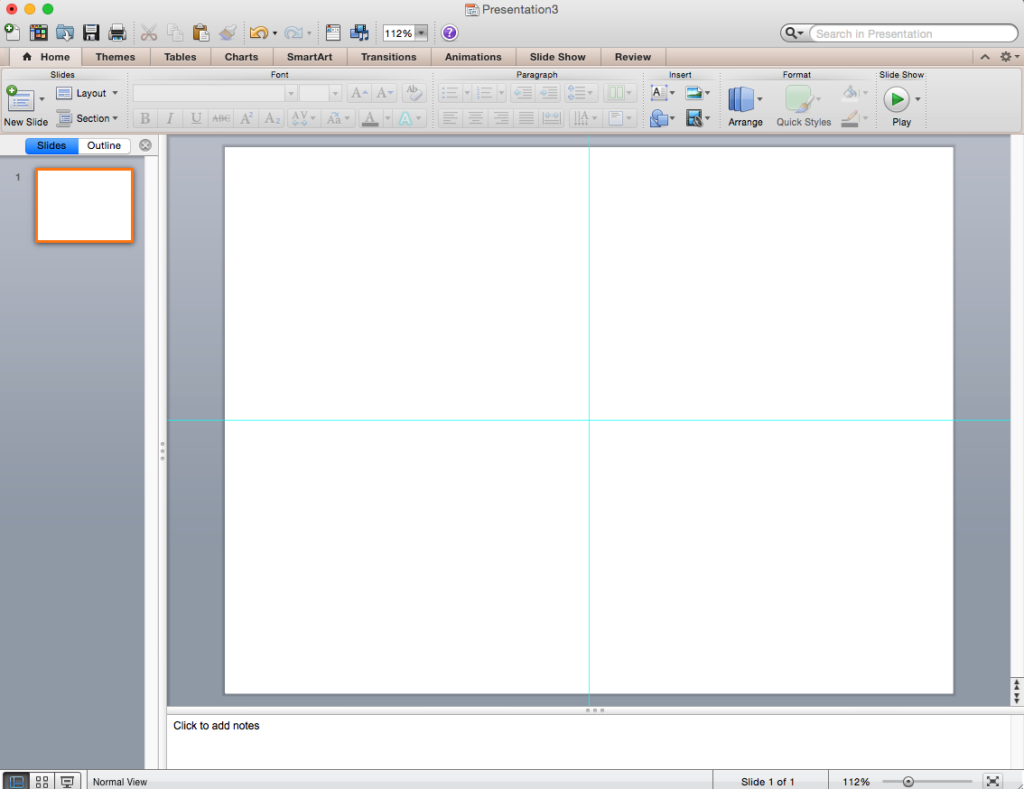
Tadah! Now I have faint turquoise lines. If the lines become annoying, you can get rid of them by reversing the process.
5. Align clipart.
Now that your page is ready, you can begin adding clipart. In the screenshot below, I’ve added a rectangular frame and clipart of a girl holding a small frame.
Let’s pretend that I want to center the girl inside the larger, rectangular frame. I’ll show you two ways to do this. First, we’ll align the objects using the “Home” Ribbon, as shown in the screenshot below.
Important: You must select BOTH the frame and the girl to align them together. If you select only one object (such as the girl), it will immediately align to the center of the page rather than the center of the large, rectangular frame.
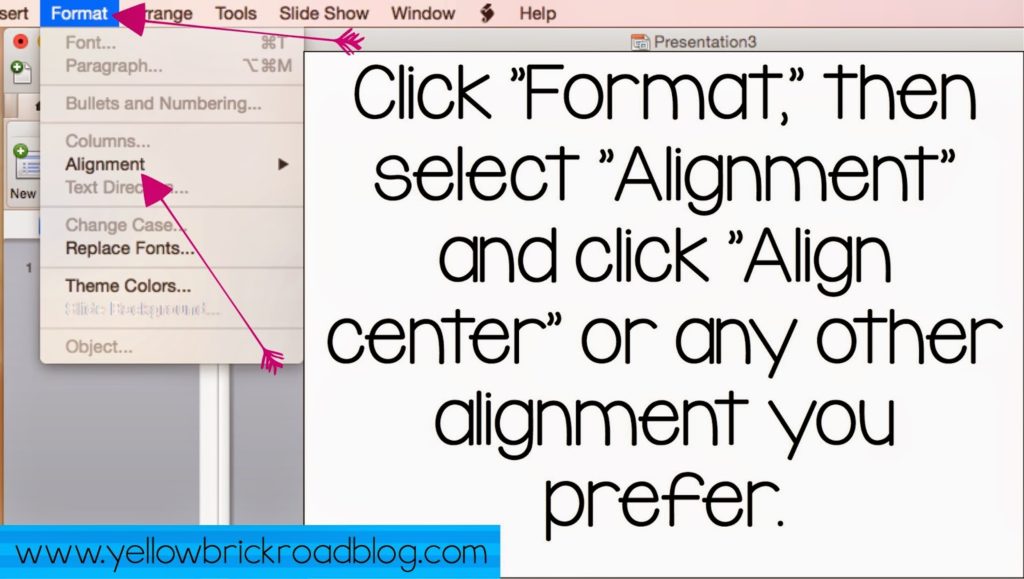
Here’s another way to perform the exact same option using the top menu bar instead.
Do you like the clipart I’m using in my example? If so, you can find the boy and girl clipart at Whimsy Workshop Teaching. The rectangular frame is by Krista Wallden and can be found at Creative Clips.
6. Crop clipart.
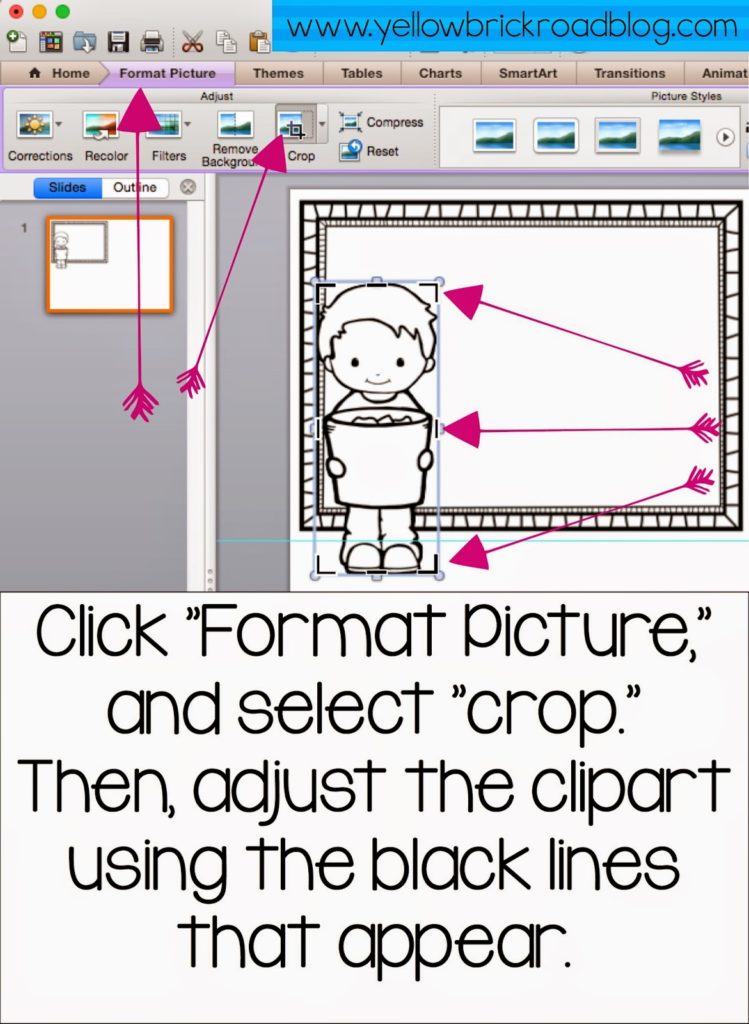
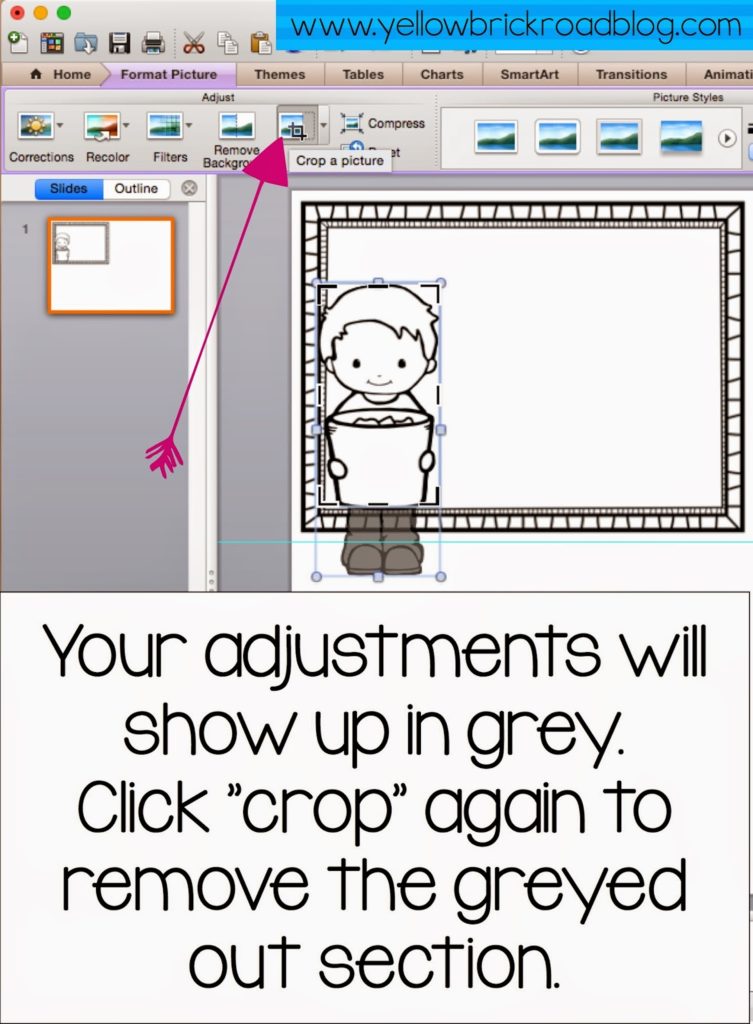
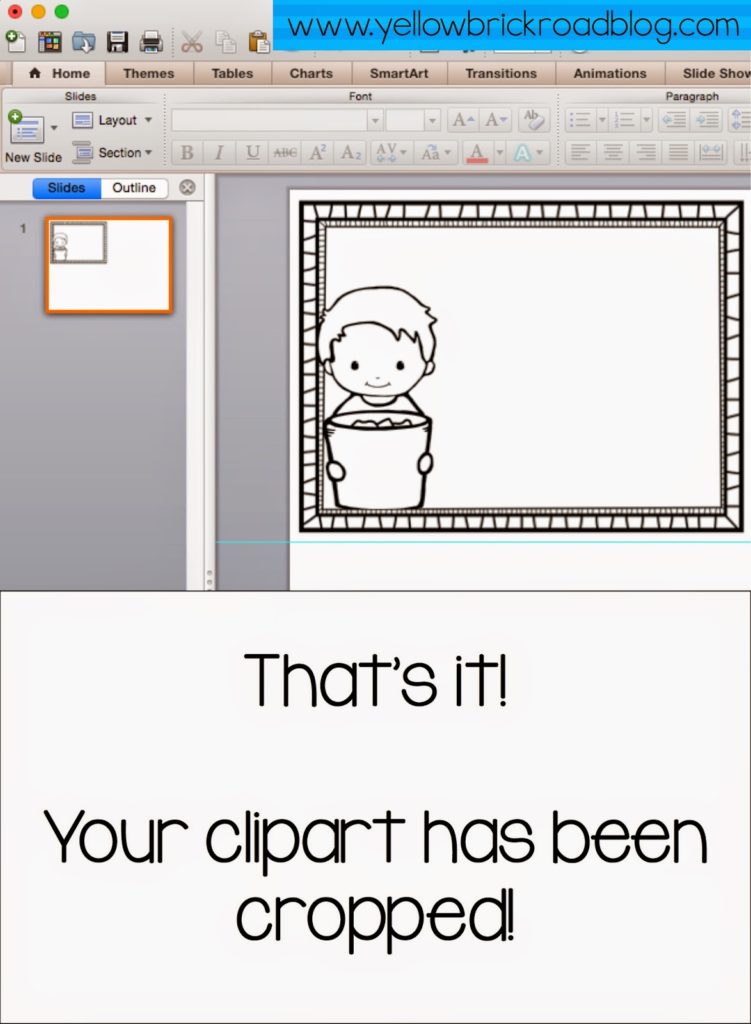
Sometimes, your creation may call for some cropping in order to achieve the look you want. In my case, I want to crop the length of the clipart (the boy’s legs) in order to fit it inside the rectangular frame.
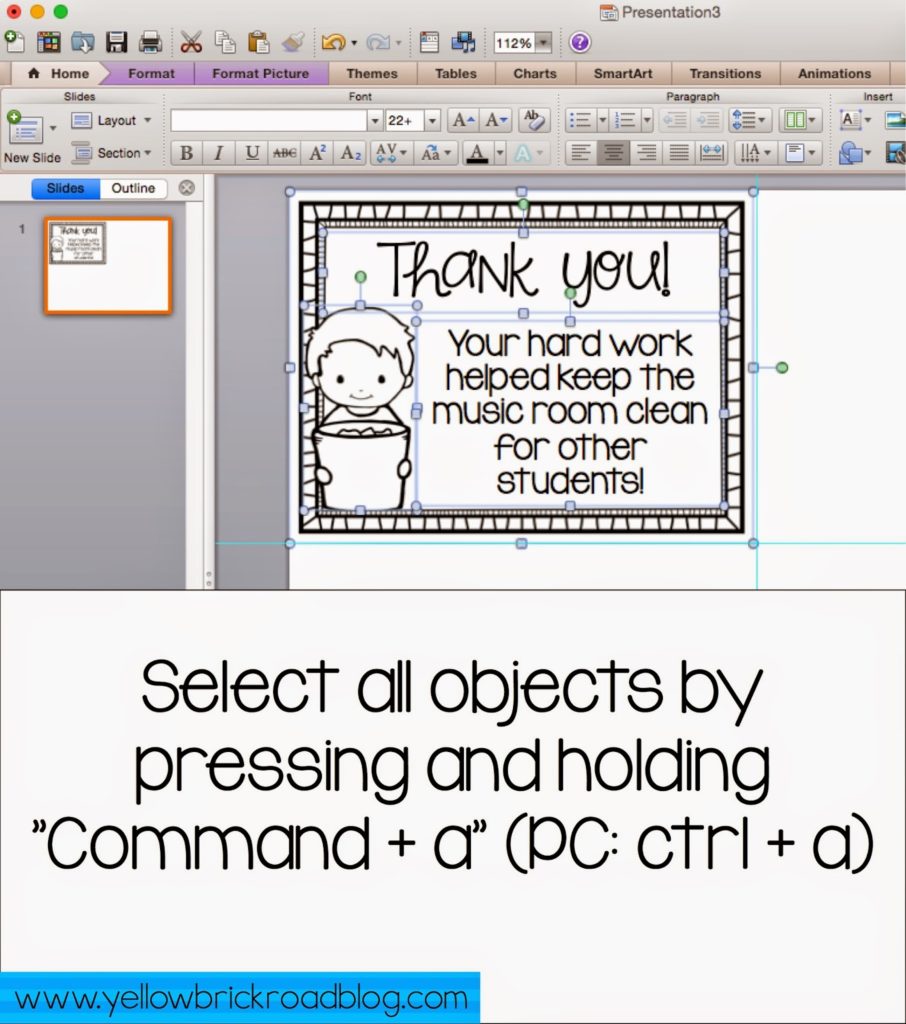
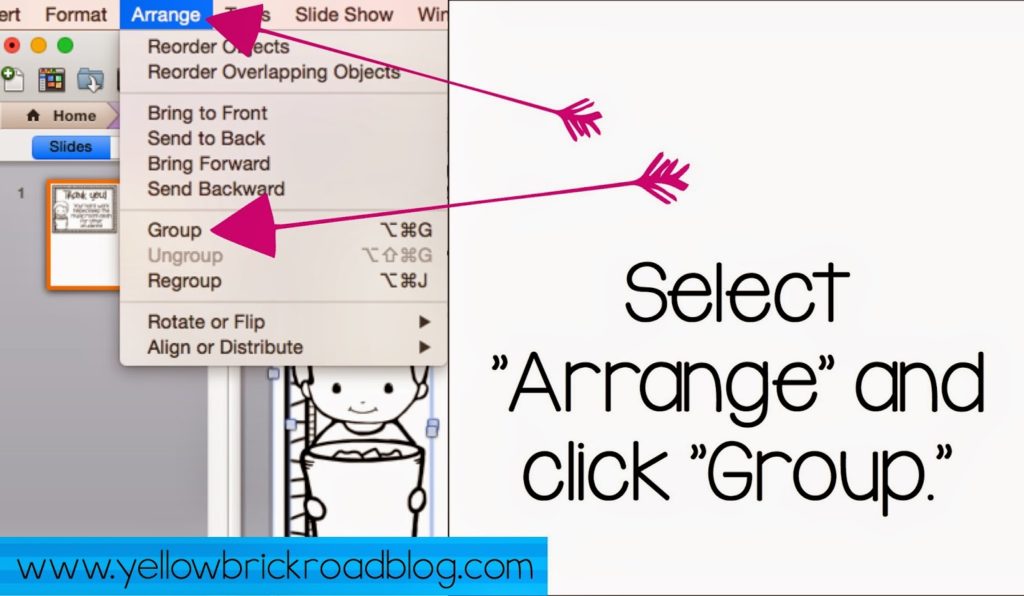
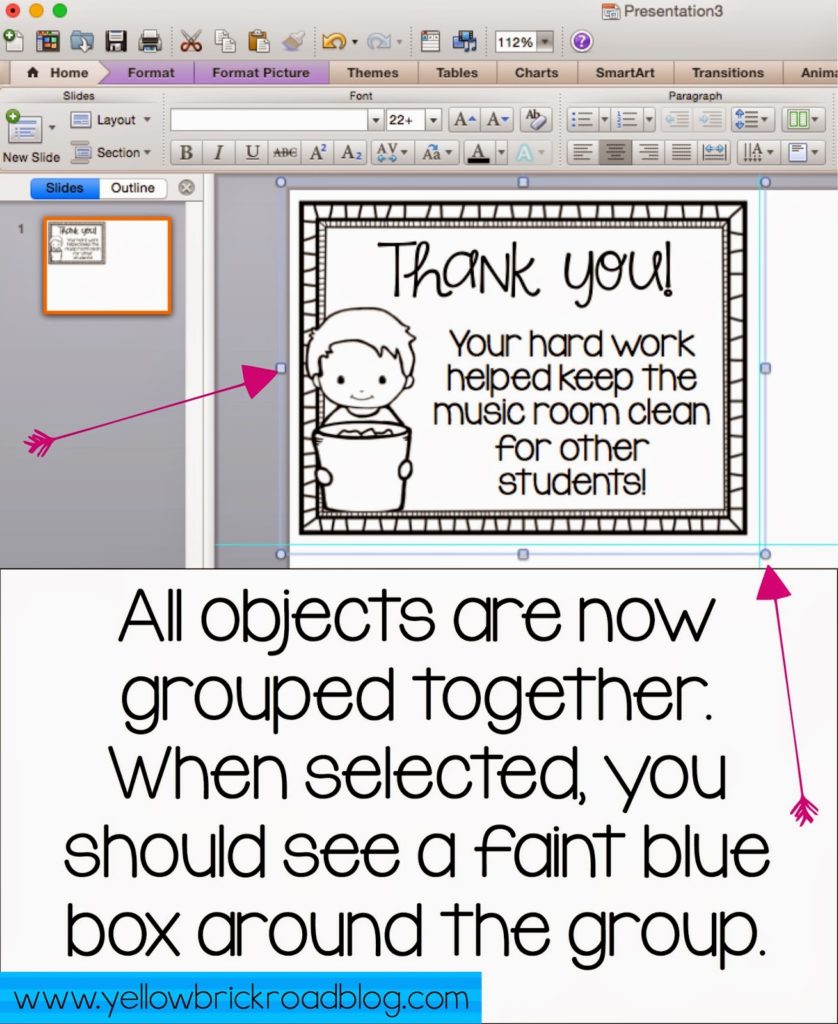
7. Group the clipart.
Once the certificate is finished, you will need to group the objects together in order to easily create copies to fill the rest of the page.
8. Copy and Paste
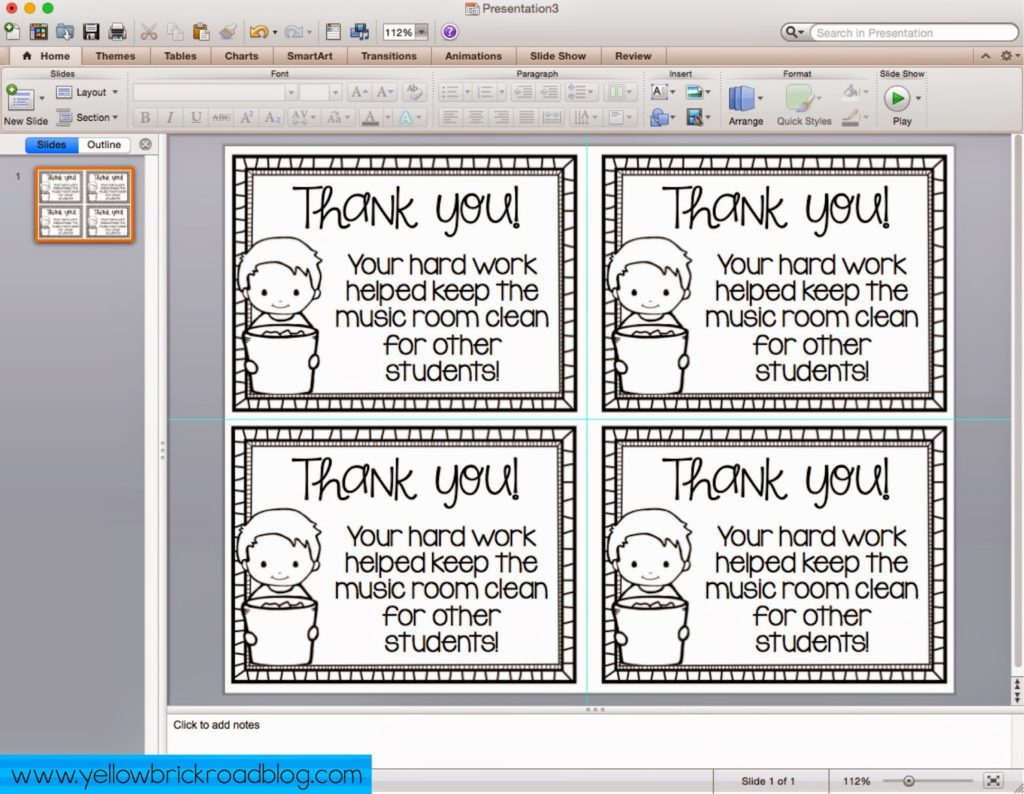
Now that all your objects are grouped together, you can easily copy and paste your certificate into each quadrant to fill up the page.
Did you notice in the screenshot below that my center gridline is slightly off center? Good! Me too. I’d accidentally moved the gridline while resizing clipart, but it’s a simple fix. Just grab the gridline with your pointer/cursor and drag until it shows “0.00.”
In addition to your static guides, you should see faint blue lines that appear as you’re adjusting objects within each quadrant. These are called the “Dynamic Guides,” and they help you align the objects with each other as they’re being moved. This alignment will make cutting with a paper trimmer much easier, especially if you are cutting the happy notes in bulk!
10. Finished Product
Now all that’s left to do is save your project, print, and cut!
I hope this tutorial has been helpful to you. If you have any questions, please don’t hesitate to leave them in the comments section. You can also e-mail your question to me directly by clicking on the envelope at the top, right-hand corner of this blog.
Happy PowerPointing!




3 Responses
I have a confession. Are you ready? I LOVE your blog. Also, I love your tech tutorials. I don't even want to think about how much time it takes for you to get all those screen shots with directions, but they are awesome. Also, I love the alignment tool. It is my best friend. We are besties. Also, I love happy notes. They are seriously the simplest and most effective teaching tool I use.
Bahaha, we share a circle of friends don't we? Oh, and my desktop is always littered with screenshots when I finish a tutorial 🙂 I'm glad you liked it!
Interesting tips for amateur. I can advise you to use Power Point templates to improve your presentation design and make it more individual.
There are a lot of websites providing the Power Point templates but I'm using this one
https://www.poweredtemplate.com
There are more than 40 thousand free Power Point templates.